Convert Lumix GX9 4K MP4 for FCP and Premiere Pro

The Panasonic Lumix DC-GX9 is a rangefinder-style Micro Four Thirds camera whose most recognizable feature is its tilting electronic viewfinder. We can record 4K MP4 footage via this new camera. When the shooting is completed, you may need to import the 4K MP4 footage to the professional non-linear video editing software – FCP or Premiere Pro for making virtual stunning videos for film, TV and web. The following article will show you how to smoothly import Lumix GX9 4K video into your editing software for high quality and high performance post editing workflow.
Can FCP and Premiere Pro work with Lumix GX9 4K files?
The new version CC of Premiere Pro CC and new version X of FCP has native support to work with 4K. Import and edit 4K footage content is direct, without rewrapping or transcoding. If you don’t upgrade your software to the latest version, you can’t import video to your editing software, or you can’t play the loaded videos in the preview window.
Transcode Lumix GX9 4K MP4 for FCP and Premiere Pro
To successfully load Panasonic 4K MP4 files into Final Cut Pro (FCP X, FCP 7, FCP 6) or Premiere Pro (CC, CS7, CS6, CS5), you will need to perform a format transcoding process. Here, you can complete the work with our best, which helps to directly produce Final Cut Pro specially optimized Apple ProRes, Premiere Pro H.264 codec so that you can direct load and import the 4K footage into FCP and Premiere Pro for fast and fluid post-production. Which one can do this job? Acrok HD Video Converter for Mac is your best choice.
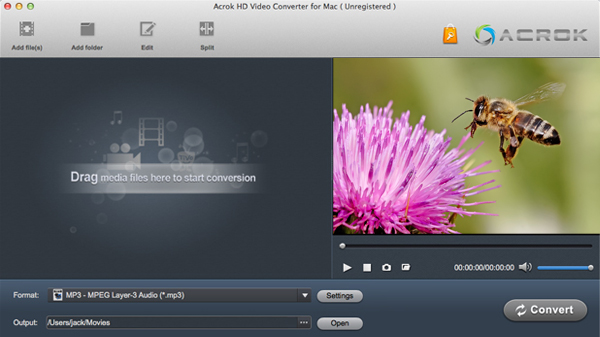
Free download Lumix GX9 Video Converter


Edit Panasonic Lumix GX9 4K MP4 videos
Want to do some basic video editing work before proceeding to the professional post-production workflow with FCP and Premiere Pro? You can done that job with our program with ease. With the “Trim” function you can easily cut off unwanted parts or segments form your video, the “Crop” tool enables you to cut off unwanted edges around the video. “Watermark” – Add image or text watermark to videos; 3D – Convert 2D to 3D or add different 3D effect; Subtitle – Add plug-in SRT, ASS, SSA subtitle to videos; You can also complete other video editing task in the program’s “Video Editor” window according to your own needs.
How to convert Lumix GX9 4K MP4 for FCP and Premiere Pro?
Step 1: Transfer footage from Lumix GX9 to computer.
Directly connect the Lumix GX9 to the computer via a USB cable. Then copy the recorded videos to your PC.
Step 2: Load videos.
Run this 4K Video Converter. Click the “Add Files” option to add the Panasonic Lumix GX9 4K videos that have been transferred from your camera to your hard drive.
Step 3: Choose output format.
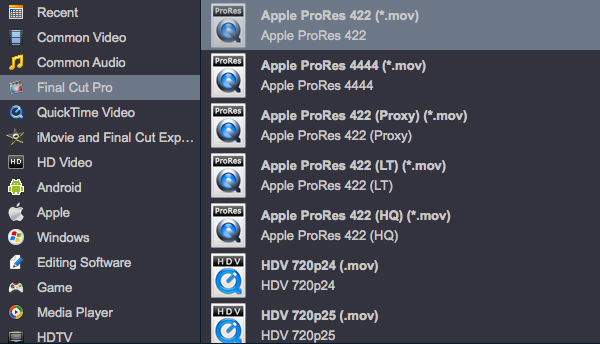
Click the “Format” bar and switch to “Final Cut Pro” option and select “Apple ProRes 422(*.mov)” as the output format for non-linear post work-flows in Final Cut Pro (FCP X, FCP 7, FCP 6).
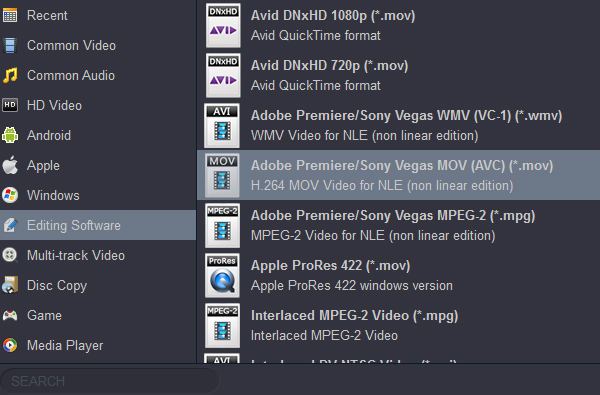
For Adobe Premiere Pro users, Please select “Editing Software” the choose “Adobe Premiere/Sony Vegas (AVC)(*.mov)” as output format.
Step 3: Start the conversion process.
Go back to the main interface, hit right-bottom “Convert” button to start to encoding Lumix GX9 4K MP4 to FCP/Premiere Pro native supported file formats. When the conversion is completed, feel free to import converted Lumix GX9 videos to FCP or Premiere Pro for professional post-production workflow.