Import and edit DJI Mavic 2 Pro HEVC in Premiere Pro CC
Facing problems importing DJI Mavic 2 Pro HEVC/H.265 footage to Premiere Pro CC for further editing? This article then would be your great helper showing you how to convert HEVC/H.265 to Premiere Pro CC completely compatible files in step by step. In order to keep the video quality as well as finish the HEVC Premiere Pro CC task as quickly as possible, an HEVC Video Converter is in use. Just download and install it, then follow the three steps before you import DJI Mavic 2 Pro HEVC to Premiere Pro CC for editing:
Experiencing problems importing DJI Mavic 2 Pro HEVC files into Premiere Pro CC for further editing? If you are working on a Windows 10 that is not powerful enough, you may encounter problems one or another handling 4K H.265 footage in Premiere Pro CC, especially those with 4K resolution. Learn a workaround to get Premiere Pro CC working well with a7R III H.265 footage.
Issues editing DJI Mavic 2 Pro 4K H.265 30p in Premiere Pro CC
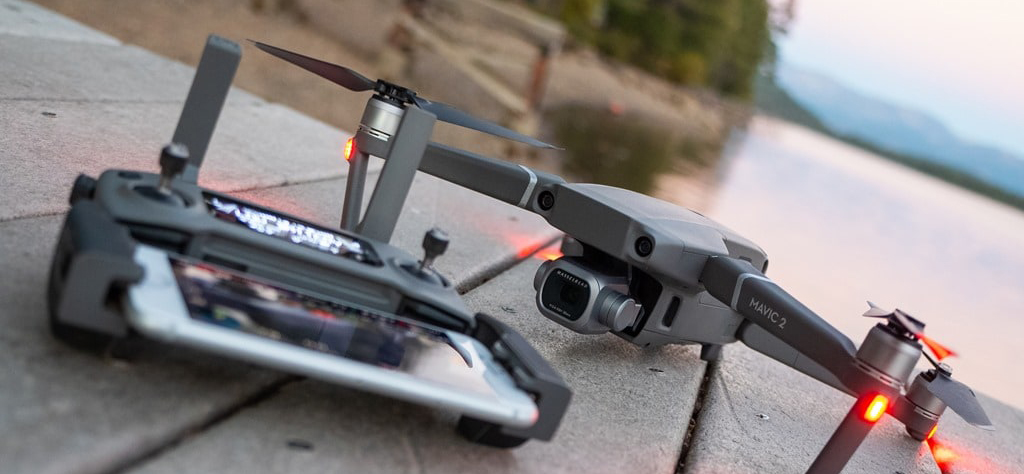
“I have a DJI Mavic 2 Pro which I among other things use to shoot video. The format options are either MPEG-4 or H.265/HEVC. The higher 4K quality option is H.265. Everything looks smooth and great on the camera’s LCD but when I try to edit the 4K footage in Premiere Pro CC it’s like the framerate drops a lot and the editing process is unstable and unreliable. I really don’t know what causes this issue. Would really appreciate if someone could clear this up for me.”
In that case, we would recommend converting the footage to a format that is best suitable for use in Premiere Pro CC prior. Learn how to transcode DJI Mavic 2 Pro H.265 footage to H.264 .mp4 for Premiere Pro CC editing.
If for any reason you are having issues editing DJI Mavic 2 Pro H.265 footage in Premiere Pro CC, we would recommend converting the footage to a format that is best suitable for use in Premiere Pro CC prior. Here’s what you need – H.265 to Premiere Pro CC Converter
Which video converter should we choose? To achieve the goal, Acrok Video Converter Ultimate is the best video app we can recommend. Overall, the program not only can help you to transcode H.265/HEVC to H.264 MP4 with high quality (even 4K), but also can help you do some premiere editing before conversion, such as merging DJI Mavic 2 Pro files together, triming out unwanted frames, removing the interlaced lines, replacing audio with your favorite music, and customizing file size and video quality for your portable players.
Free download HEVC to Premiere Pro CC Converter


How to convert DJI Mavic 2 Pro HEVC footage to Premiere Pro CC preferred H.264?
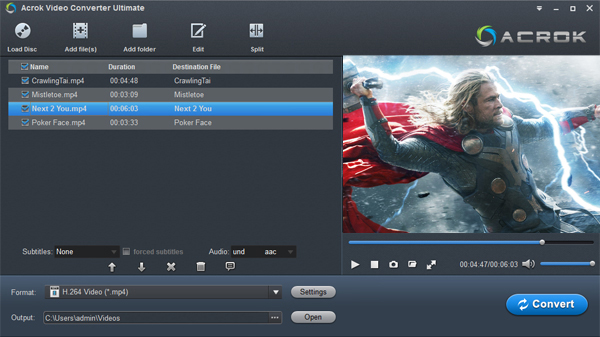
Step 1: Open up Acrok Video Converter Ultimate as a DJI Mavic 2 Pro HEVC Converter for Premiere Pro CC. When its main interface comes up, click “Add File” to load your source media.
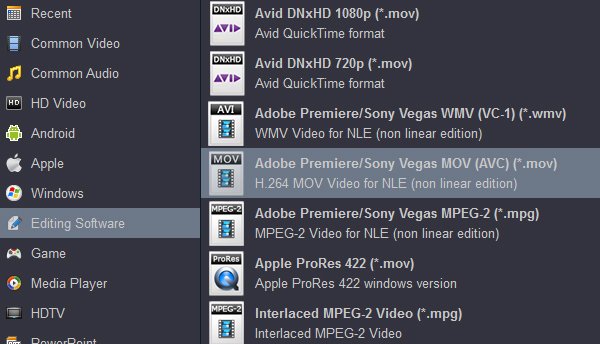
Step 2: Select output format for Premiere Pro CC
To convert DJI Mavic 2 Pro H.265 video files for Premiere Pro CC, from “Format” list, choose “Adobe Premiere AVC (*.mov)” as output format under “Editing Software” column. This codec is also suitable for use in the discontinued Premiere Pro CC.
Step 3: Custom video and audio settings (optional)
If necessary, you can click “Settings” button and go to settings panel to modify video and audio settings like video encoder, resolution, video bit rate, frame rate, aspect ratio, audio encoder, sample rate, audio bit rate, and audio channels.
Step 4: Begin DJI Mavic 2 Pro H.265 to Premiere Pro CC supported video format conversion
When ready, click “Convert” to start format conversion. If you don’t want to wait for the entire conversion process, you can tick off “Shut down computer when conversion completed” and go away to do other things. Once the conversion process is complete, you can click “Open” button to get the generated H.264 MP4 files for editing in Premiere Pro CC with optimum performance.
convert hevc for premiere pro cc dji mavic 2 pro premiere pro cc edit hevc in premiere pro cc hevc to premiere pro cc hevc video converter premiere pro cc hevc